J1939 Data Link Diagnostic Tool
What is the J1939 Data Link Diagnostic Tool?
It is a tool that displays basic J1939 component information and J1939 voltage that can help trace J1939 malfunctions in the Cummins proprietary data link to a particular location in the harness and down to the exact wire.
The Cummins INLINE 7 adapter needs to be connected at the 3-pin service connector in order to successfully trace the malfunctions.
Updating the INLINE 7 drivers will be needed to be able to use the tool. (latest driver is pending to be out, but will be out soon)
Benefits
- Reduced troubleshooting time significantly (no need to inspect entire harness as current troubleshooting directs)
- Isolate between device vs wiring harness malfunctions as well as devices’ power supply vs J1939 supply faster than current troubleshooting
- Reduced repeated visits and providing confidence to technician that the failure is indeed in a particular location of the harness
- Reduction of collateral damage to device connector pins and harness connectors (multimeter punctures leading to intermittent failures in the future)
- Tool stays connected at ONE SINGLE LOCATION reducing frustration, confusion, and time to identify connector pinouts from the service wiring diagram
- In depth fault isolation of OEM side harness malfunctions including aftertreatment interface harness
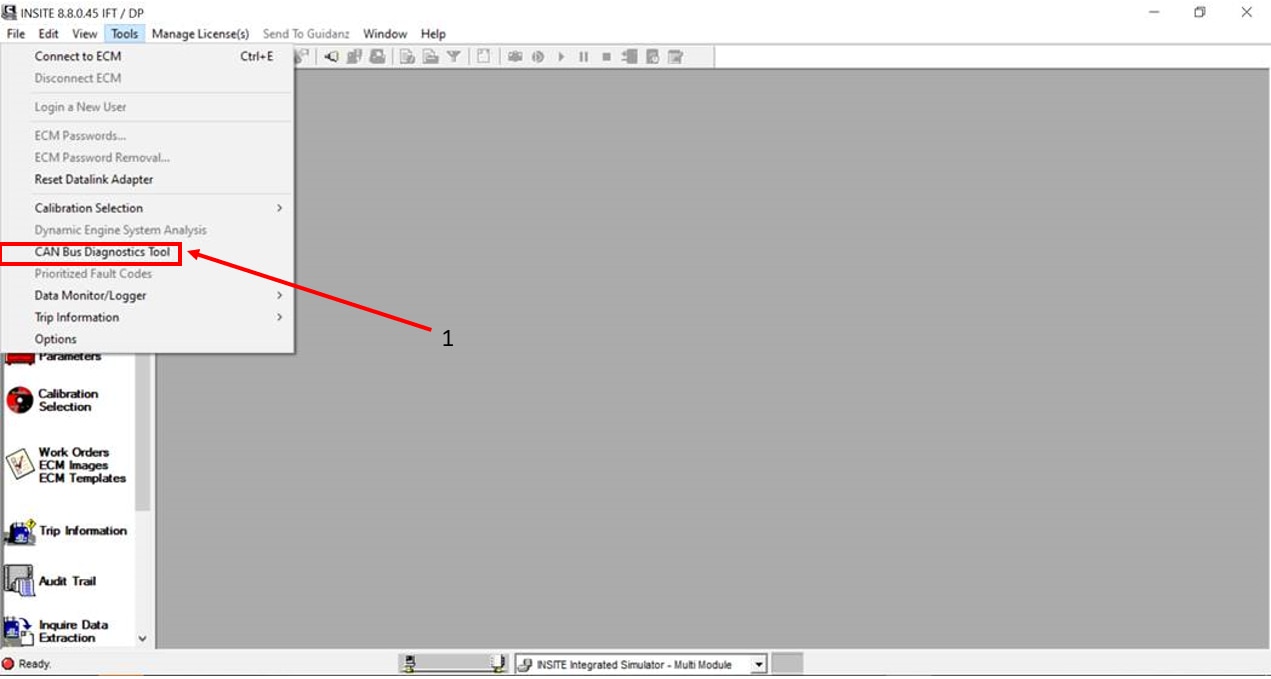
Where is the tool located at?
It is located in INSITE in the tools menu on top of the screen. When opening the tool, all other connections to the ECM will be disconnected in order to reduce a “bus heavy” condition which causes intermittent communication issues in the data link.
How to use the tool
The service procedure will guide you through the steps of using the tool successfully. Ensure the following are done prior to using the tool for malfunction troubleshooting.
- Ensure the key switch is in the OFF position.
- Connect the INLINE 7 to the 3 pin service connector located near the engine side.
- Select the file location path for recording logs to be saved in to.
- Select the Connect button in the J1939 Data Link Diagnostic Tool Settings tab.
- Select the Record button after successful connection.
- Turn the key switch to the ON position.
Then refer to the Analyzing the Data section in the service procedure. It contains 5 scenarios that are often experienced in the field and can be diagnosed easier by using the J1939 Data Link Diagnostic Tool. All of these sections help fault isolate efficiently and get the end user to the root cause of the data link issue. To understand which scenario is being dealt with currently, collect the average values of the J1939 voltage and busload located in the J1939 Data Link Diagnostic Tool Component Status and CAN Voltage tab. Then, proceed to the matrix that guides to the right section of the procedure to begin troubleshooting.
- Inactive Fault code troubleshooting – used when customer comes into the shop with a fault code(s) that was/were active at one point and just recently became inactive.
- Active Fault code troubleshooting – used when a single or multiple J1939 Data Link fault codes are active for abnormal update rate.
- Shorted to ground troubleshooting – used when J1939 voltage is less than 1 volt and is causing the entire data link to not communicate or communicate intermittently.
- Shorted to voltage troubleshooting – used when J1939 voltage is greater than 11 volts and is causing the entire data link to not communicate or communicate intermittently
- Shorted J1939 wires to each other troubleshooting – used when J1939 voltage is normal, but all components are not communicating.